Call Hercules Fence of Virginia Beach!
If you’re thinking of adding a fence to your property you probably already know all the great benefits they have to offer. But if your main goal is privacy, you probably have noticed that you tend to have to sacrifice aesthetics to get it. This is because privacy fences are usually solid panels made of wood or vinyl that don’t offer much decoration. One way to jazz up your flat top panel privacy fence is with cap and trim. Read on for a guide to building a new cap and trim fence.
Prep Your Area
The first step to building a fence is to mark out where it will go with stakes and twine. Using a three-pound hammer, drive stakes into the ground where the corners of the fence will be. Stretch mason’s string or twine between the stakes and mark off every 8 feet with masking tape ikon the string. At each 8 foot marker and at the corner stakes, dig a post hole that is 24” deep and 10-12” wide. Set an 8’ long 4-by-4 in each hole and add half of an 80-pound bag of dry concrete mix. Don’t add water yet.
Attach the Panels
Working one-panel section at a time, lay a 1-by-4 on the ground between the first two posts and stand the panel section up on it. The first post is the corner post, and the outside face of this post should be upright and even with the ends of the horizontal runners of the panel. Once everything is even and upright, use two 3” treated deck screws to secure them together. On the other side of the panel, stand the next post upright and align it so that the horizontal runners end at the center line of the post. Secure them together with two 3” treated deck screws. Once the panel and posts are upright and secured together, add water to the concrete mix in the holes and mix till you have oatmeal consistency. Use a level to adjust the posts as needed, then fill the holes with dirt and tamp it down. Repeat this with the remaining posts and panels.
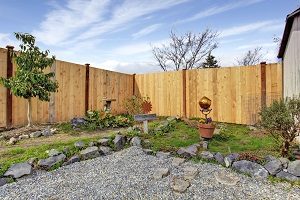
Add the Cap and Trim
Once the fence is up, the last step is to add the trim and cap. Use an 8’ length of 1-by-2 that is the same material as the pickets in the panel, and run it horizontally on the outside of the fence at the top, so that it is flush with the top of the pickets. Use a 1-5/8” screw every 12 inches to attach the trim piece. Finally, lay a 2-by-4 on top of the fence so that it overhangs the trim piece by about 3/4”. Screw down the cap with 3” treated deck screws every 18” and into every post.
Take Care of All Your Residential Fence Needs with Help from Hercules Fence of Virginia Beach
Call Hercules Fence of Norfolk and Virginia Beach for your fencing needs. We have decades of experience in the fencing industry and can offer you the best in ornamental steel, chain link, wooden fences and more. Our dedicated teams of fencing professionals are highly trained, skilled, and experienced in providing quality fence installations of any type. We’ll work with you to find a fence that best suits your needs and budget.
Contact Hercules Fence of Virginia Beach at (757) 321-6700, drop in, or contact us on our website to learn more about winter fence construction! You can keep up to date with offers and information from Hercules Fence of Virginia Beach on Facebook, Pinterest, LinkedIn, and Twitter.